
This is an advanced way to structure a PHP Rest Api and all we will do in this article is to go through the main files in this project.
Download the source code of this project available on Github.
The project has lots of amazing functions and classes that you should really take a look at and use in your future projects.
What is REST API?
REST stands for “Representational State Transfer”. API stands for “Application Programming Interface”. It is a set of rules that allows one piece of software application to talk to another. Those “rules” can include create, read, update and delete operations.
Here’s how it may look in everyday life: You’re searching for a hotel room from an online travel booking site. Using the site’s online form, you select the city you want to stay in, check-in and checkout dates, number of guests, and number of rooms. Then you click “search.”
As you may know, the travel site aggregates information from many different hotels. When you click “search,” the site then interacts with each hotel’s API, which delivers results for available rooms that meet your criteria. This can all happen within seconds because of an API, which acts like a messenger that runs back and forth between applications, databases, and devices.
Why do we need REST API?
In many applications, REST API is a need because this is the lightest way to create, read, update or delete information between different applications over the internet or HTTP protocol. This information is presented to the user in an instant especially if you use JavaScript to render the data on a webpage.
Understanding REST API
REST provides a block of HTTP methods which are used to alter the data. The following are common HTTP methods:
GET — is used for reading and retrieving data.
POST — is used for inserting data.
PUT/PATCH — is used for updating data.
DELETE — is used for deleting data.
Basically, REST phenomena works on actions and resources. Whenever any action URL is invoked, it performs an individual method (or a set of methods) on that URL. I will further discuss this below with real examples.
First we will need to install Slim framework for the REST API project.
Install Slim Framework From Composer
Navigate to the main directory where you have saved the project and open terminal or cmd and run composer install.
Setup The Database
Product Table Structure
Dump data for Product table
Category Table Structure
Dump data for Category table
Connect to Database
The code below shows the database credentials. You can use PDO or MYSQli by tweaking the database_engine to either DbPDO or DbMySQLi.
/index.php
Api Routes
/index.php
Product
The code below shows a class named Product with several of its properties.
The static $definition variable contains the structure of the Product table.
the table property contains the name of the table without the table prefix. The primary array key is the primary key of the current table. The fields key contains all the columns of the table excluding the primary field.
Don’t include the primary key in the
fieldskey.
Only columns available in the fields array will be updated.
It also has a constructor method that accepts $id as param. We will use this $id to read a specific row from the database. To read a product with product_id of 5 we will do it simply by:
$product = new Product(5);
/classes/Product/Product.php
We will create a similar structure for each table we create. With the ObjectModel wrapper it will be easier to add, get, delete, update our data.
Take this for example. If we want to delete a product we simply:
$product = new Product(THE_ID_TO_DELETE );
$product->delete();
Product route
The code below shows a class named Product. This is where all endpoints that regard the products will be referred to.
/controllers/v1/Product.php
Read Products in the Database — GET Method
The code below gets all products in the database and returns a json response of all products.
We first get access to the api variable which is our whole PHP application Class. We use the class to return responses, access the data sent to our api.
To select a single column from the database for example: product_id
$sql->select(‘product.`product_id`’);
To select multiple columns:
$sql->select(‘product.`product_id`, product.`name`’);
To make this Route active we register the endpoint that will be used to retrieve the products.
$api->get(‘/products?’, ‘\BestShop\v1\Product:getProducts’)->name(‘get_products’);
The ->name() is not mandatory. There are times when you’ll need to use it. If interested in knowing more leave a comment below.
Output
You need to use POSTMAN to test our API. Download your version of POSTMAN here.
Launch POSTMAN. Enter the following as the request URL.
http://localhost/api/v1/products
Click the blue “Send” button.
Below will be the output if there is product data.
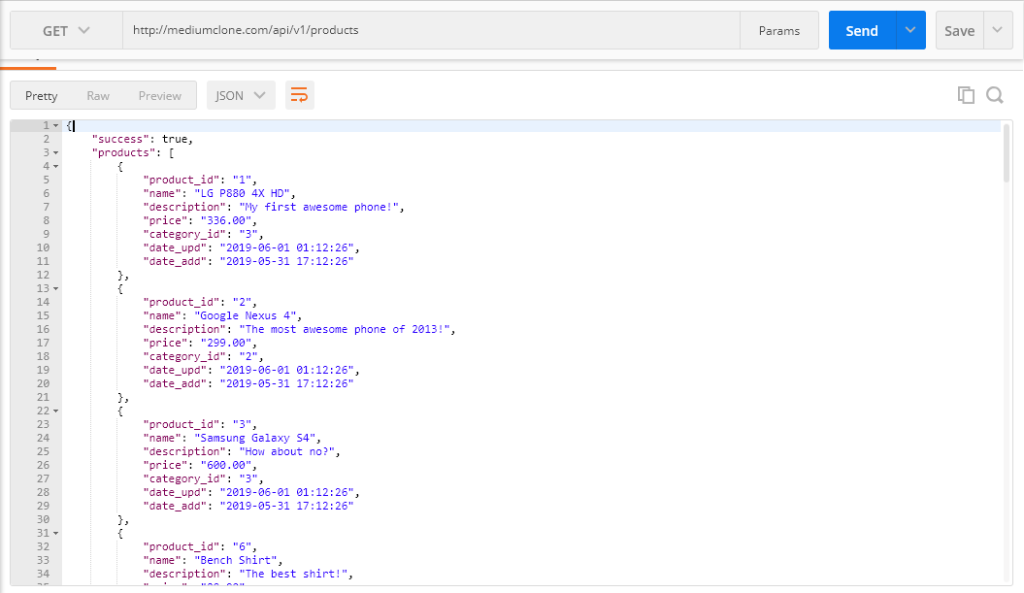
If there are no products in the database the products key in the response will be empty. It’s always good to retain the structure of your response when there is data and when there is not. Unless there there was an error with the request. In such a situation we will return "success" : fasle with an error code or message. it will be upon the developer to decide what to do with an empty products. At least that’s how I do it. You can do it in any way you feel best for you.
Add New Product — POST Method
To add a new Product we use the addProduct function in the Product Route.
/controllers/v1/Product.php
To add a new product we use the POST method. To access the data submitted to our api we simply use:
$payload = $api->request()->post();
If we had send a GET method to the api we use:
$payload = $api->request()->get();
The above code will put all the data submitted to the api in the $payload variable. To get data from the payload variable we use the code below.
$name = ArrayUtils::get($payload, ‘name’);
The ArrayUtils class has many helpful functions that handle arrays. With this class you don’t have to write endless isset and so on. To check if a key is available in an array:
if (ArrayUtils::has($payload, ‘name’)) { /*** Do something ***/ }
To make this Route active we register the endpoint that will be used to add new products. Notice that we use $api->post() for this endpoint since we add submit data via POST method
$api->post(‘/products?’, ‘\BestShop\v1\Product:addProduct’)->name(‘add_products’);
Output
To test for successful creation of a product, open POSTMAN. Enter the following as the request URL.
http://localhost/api/v1/products
Click “Body” tab. Click “raw”. Enter this JSON value and click Send via POST method.
For a successful request you should see a response similar to this.

If our api is unable to create our product it will return the below response without the product. Note that success is now set to false.

If we send invalid data to the api it will return an error response. In the case below the price of the product is not a valid amount.

Get a Single/Specific Product — GET Method
Below is a function getProduct that accepts $productId as parameter. This is passed to our api via the endpoint. /api/v1/products/{product_id}
Output
First, we will test for a product that exists. Open POSTMAN. Enter the following as the request URL via GET method. Click the blue “Send” button.
http://localhost/api/v1/products/1

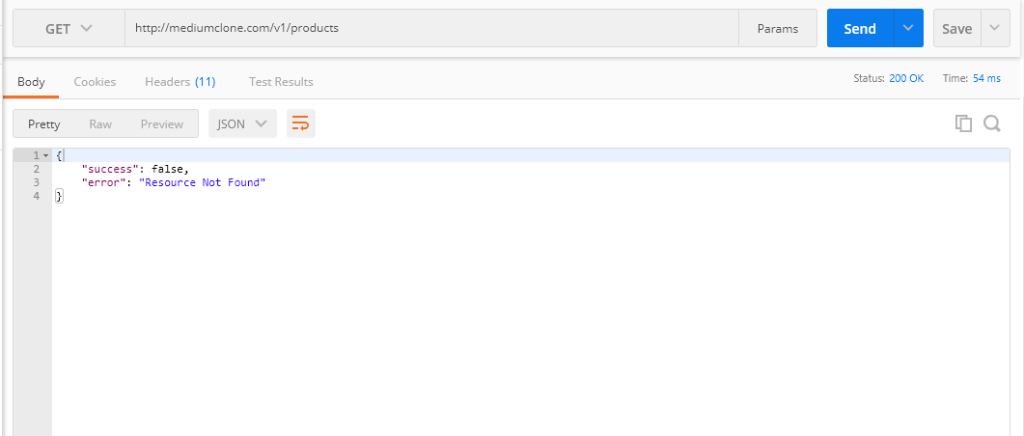
Next, we will test for a product that does not exist. Enter the following as the request URL. Click the blue “Send” button.
http://localhost/api/v1/products/999
Update a Single/Specific Product — PATCH Method
Below is a function updateProduct that accepts the $productId of the product we are updating as parameter. This is passed to our api via the endpoint. /api/v1/products/{product_id}.
To access the data submitted we use:
$payload = $api->request()->post();
Output
Open POSTMAN. Enter the following as the request URL.
http://localhost/api/v1/products/3
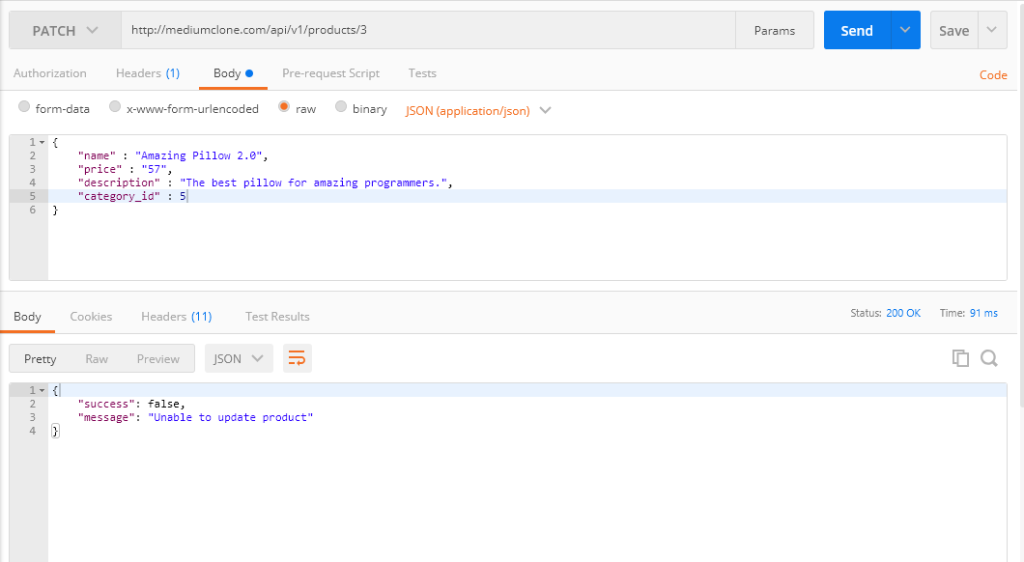
Click “Body” tab. Click “raw”. Enter the following JSON value (make sure the ID exists in your database) and click the blue “Send” button via PATCH method.
The product ID 3, is just an example. You need to specify a product ID that exists in your database. If the provided Product id does not exist you will get an error Product was not found.
If updating a product is successful, you should get a response similar to this:

If the api fails to update the product, you will get the below response.
Delete a Single/Specific Product — DELETE Method
Below is the deleteProduct function that accepts the $productId of the product we want to delete as parameter. The product_id is passed to our api via the endpoint. /api/v1/products/{product_id}.
Output
Open POSTMAN. Enter the following as the request URL.
http://localhost/api/v1/products/1
Click “Body” tab. Click “raw” and click the blue “Send” button via DELETE method.
If a product is successfully deleted, you should get a response similar to this.

If the api fails to delete the product, you should get the response below.

Search Products
Below is the searchProducts function. We pass either the name or description of the product we want to search.
To search for produtrs we use the GET method. To access the search parameters submitted to our api we simply use:
$params = $api->request()->get();
The above code will get all the data submitted to the api in the $params variable. To get specific data from the params variable we use the code below.
$name = ArrayUtils::get($params, 'name');
$description = ArrayUtils::get($params, 'description');
We also check if the description or name has been passed so we can do the search. if both are not provided we return an error message.
if(!$name && !$description) {
         return $api->response([
            'success' =>    false,
            'message' => 'Enter name or description of the product'
         ]);
}
If both of these values have not been provided you will get this error.

To make this Route active we register the endpoint that will be used to search for producrs. Notice that we use $api->get() for this endpoint since submit data via GET method
$api->get('/search?', '\BestShop\v1\Product:searchProducts')->name('search_products');
Output
Open POSTMAN. Enter the following as the request URL.
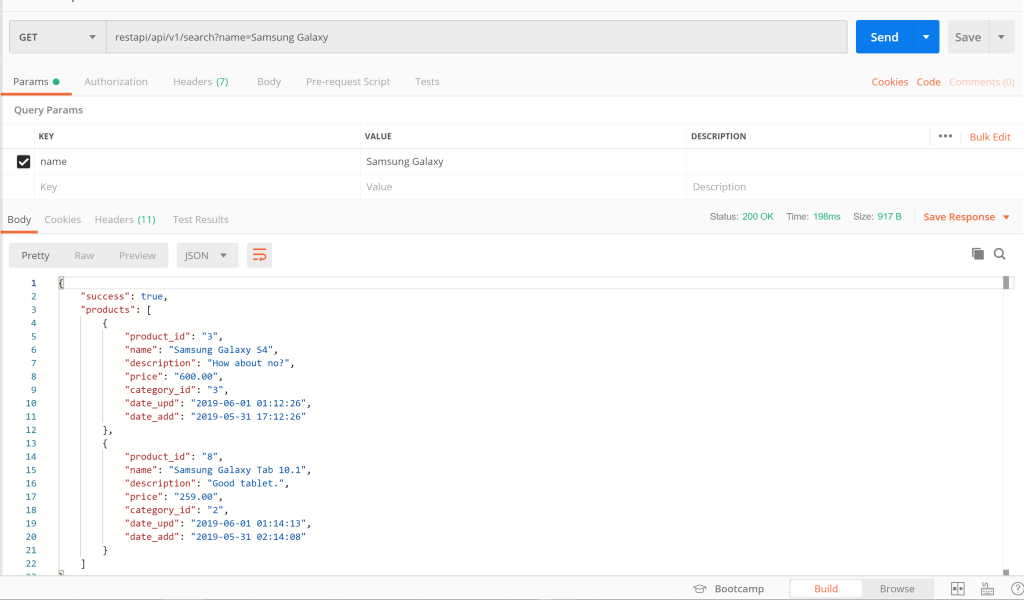
http://localhost/api/v1/search?name=Samsung Galaxy
Click the blue “Send” button via GET method.
If there was a product found with the terms we provided, it should look like this:
And that’s it guys! If you have any questions or feedback please leave a comment. One last thing, if you are interested with an advanced project with API authentication and file upload and many cool stuff let me know.
To get all the files of this project download or browse the code visit the repository via this Github link.